Feeds:
Posts
Comments

Archive for the ‘Food’ Category

IMG_7519

Scrabbling around for a starter to serve Friday week at the Garlic Festival lunch–and with three aubergines sitting looking at me expectantly, I got to flicking through some well-thumbed pages.

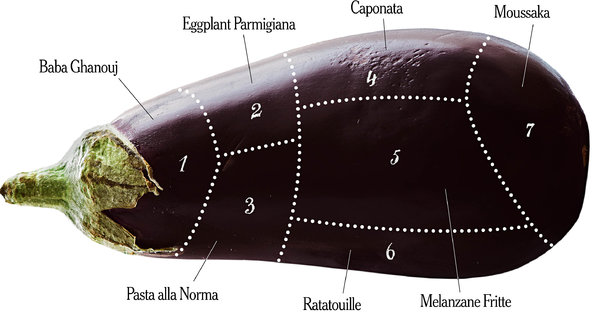
The idea for rounds came from Antonio Carluccio’s Vegetables cook book.

IMG_7493

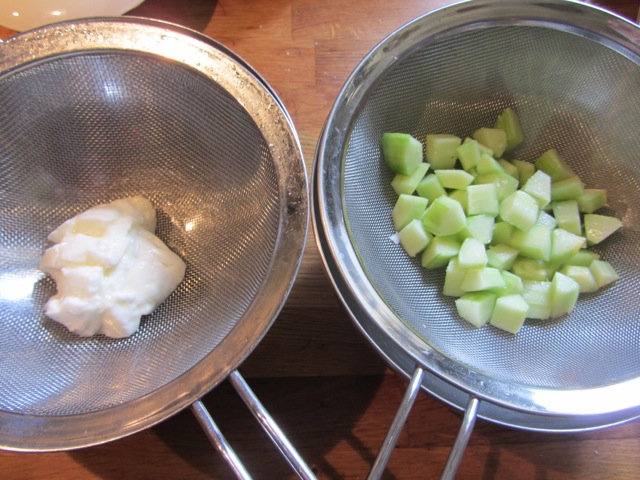
The key ingredients, doubling as casino counters!

So…

for 2 (on the 2nd, I’m upping the ante and cooking for 22!)

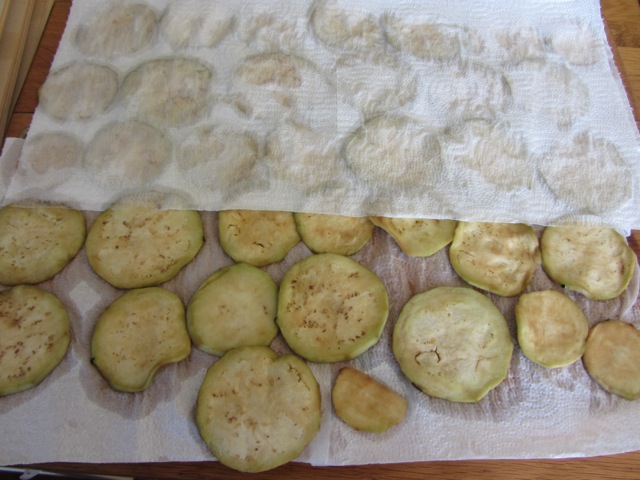
1 largish aubergine–cut across in half inch slices, salted and left to drain for at least an hour

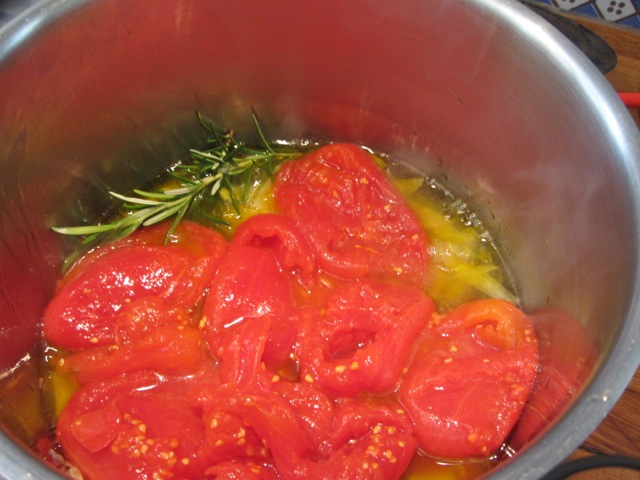
2 ripe tomatoes of similar circumference–sliced a little finer

6oz/150gms feta cheese–crumbled

a few fresh leaves of basil, parsley and mint–chopped together

parmesan cheese–grated

olive oil

salt and pepper

heat the oven to 220C/430F

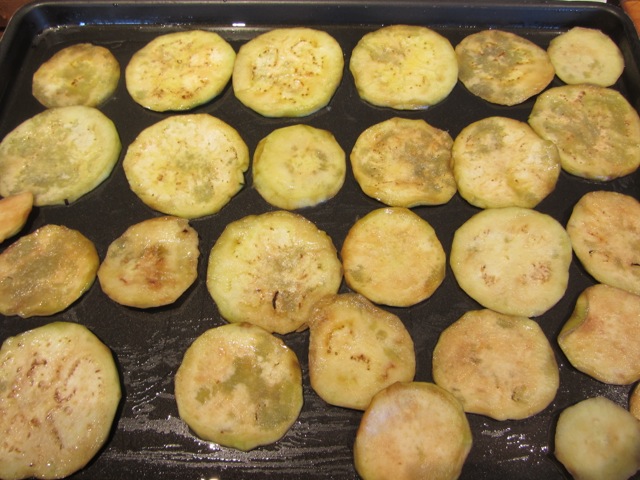
Cover an oven tray with foil and brush it with oil.

Brush both sides of the aubergine rounds with olive olive and lay them out on the foiled tray.

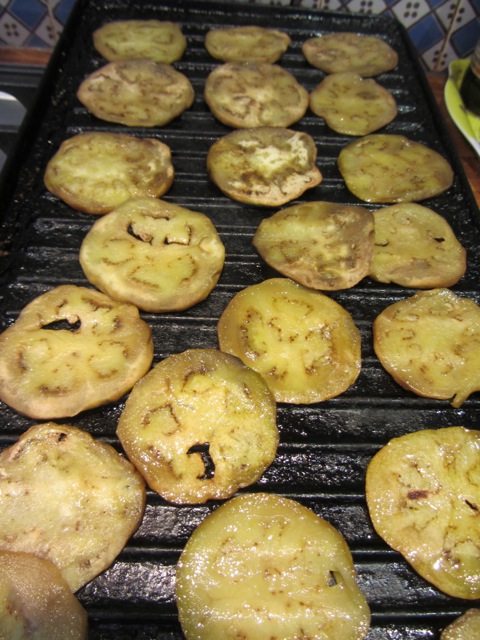
Place the tray in the uppermost part of the oven and bake for 20 to 25 minutes until they are thoroughly cooked through and soft.

Add the chopped herbs to the feta and using a teaspoon, spread a little on each cooked aubergine round.

Sprinkle the tomato slices with a pinch of salt and little olive oil.

Lay one on each aubergine round and top them off with a pinch of the grated parmesan.

IMG_7499

Return the tray to the top of the oven and cook for a further 15 to 20 minutes.

Take them out when the tomato has a melted look and the parmesan has browned a little.

IMG_7505

Serve them straight away or at room temperature.

Increase the odds of a wow–with a leaf of basil or other herb–if you have any.

IMG_7513

Read Full Post »

It’s all in the name!

This is the tenderest part of a pork loin.

It spends the night–or several hours at least–in a plastic box or bag in the fridge, bathed in a simple marinade.

Then it’s cooked in a hottish oven for between 15 and 20 minutes.

A pound-and-half will feed four easily, maybe six–and as tenderloins are usually of similar dimensions this allows you to double-up easily for big groups.

A good dish for company then–and delicious cold the following day too.

IMG_7400

Another recipe from my new book Healthy Eating for Life to be published in January 2013.

1 tenderloin of pork–most of the fat cut away

for the marinade:

1 clove of garlic--pulped with a teaspoon of salt

1 tsp dijon mustard

the spears of a branch of rosemary–chopped

the leaves of several thyme branches

salt and pepper

3 tblsps olive oil

  • Combine the marinade ingredients in large bowl and whisk together.
  • Bathe the tenderloin in the marinade.
  • Place in a plastic box or plastic bag and store in the fridge overnight.

IMG_7385

  • Let it come back to room temperature before taking it out of the bag/box and allow the majority of the marinade to drip off it.
  • Set the oven to 200C/400F.
  • Heat the oil in an oven-proof pan; when it’s hot, “seal” the tenderloin in a tablespoon of olive oil.

IMG_7386

  • Put the tray in the oven and cook for about 20 minutes.

IMG_7387

  • After 15 minutes, check for doneness by gently presses down on the meat with a finger or thumb. It should be supple–but not too supple. Alternatively, slice into the centre of the loin to double-check. If the juices run pink, cook on for a couple of minutes.
  • Try not to overcook as it renders the meat leathery.
  • Trial and error kicks in here–the inexact science of when meat is ready! (It was ready in 18 minutes last night–depends on the thickness of the fillets.)

Read Full Post »

IMG_2286

We just got news of cancellations for the October 2013 workshop–freeing up several places.

IMG_2230

Below are some impressions from Bravehearts (my name for those intrepid souls who’ve been brave enough–crossing continents in some cases–to take a risk and sign up!) who came to the previous workshops (October 2012 and May this year).

I liked the small, hands-on nature of it.  Robin made the whole thing feel very informal and yet everything was very well organized.   

IMG_2190

I also like that there were breaks.  I never felt overwhelmed.  Indeed, the whole thing felt like the most amazing multi-day dinner party at which no one ever was tired or bored!

–Christopher Lupone

————–
 Robin’s teaching method: his ability to present his recipes and ingredients to a group of total strangers in a way that put everyone at ease. That naturalness of manner helped everyone work very well together. It was fun! 
IMG_6013

Excellent kitchen workspace worked very well for this size group. Well-lit, squeaky clean, not too industrial, new appliances…Much like a well-appointed home kitchen which enhanced the feeling of camaraderie among the participants.

–Dan and Jane Berical

IMG_5916

—————–
I enjoyed cooking and dining with the group–Robin’s happy approach to cooking – not fussy or dogmatic – and his relaxed approach to the class. This workshop succeeded because of Robin and Meredith (and Daisy and Valerie and Dominique and Philippe)! Their charm, encouragement and enthusiasm for cooking and living well was contagious! The wine cellar was amazing! Our final lunch on the terrace was memorable. Wine at Robin and Meredith’s house at the end of the class was the icing on the cake.
–Betsy Weber
IMG_2141
————
 I have always loved olive oil but we are constantly being bombarded that we should cook and eat as fat free.  After attending your workshop I started cooking with olive oil on a regular basis.  I eat it almost every day now.  I had my annual physical last week and I was very curious to hear my cholesterol levels as I was so afraid ingesting the olive oil would drive up my numbers.  This was going to be the moment of truth……  My cholesterol was 166 down three points from last year’s 169!  Not bad at all.  I have even dropped a few pounds.  So what is with this fat free hype?  
–Mary Pirog
IMG_2292
Come be a Braveheart this October–3rd-6th!
For details–here’s the link!


Read Full Post »

Quinoa salad

Quinoa is grown in the Andes and has shot to fame–though how to pronounce it is still a question. We’ve settled for keen-wa (sometimes I revert to keen-o-wa!). It comes in a number of colours though so far I’ve only seen red and white and has a reputation for being easily digested. It is gluten free.

A salad for all seasons this. Light and fluffy white quinoa is laced with thinly sliced red onion and flavored with lemon juice, olive oil, mint and parsley.

It looks good on a favourite plate and has surprising depth of taste.

IMG_4194

It’ll feature in my new book, Healthy Eating for Life (to be published in January 2014).

Serves four

1 cup/6oz quinoa (white preferably, for the look)

2 cups/12 floz vegetable stock—I use organic vegetable stock cubes

1 small bunch each parsley and mint–chopped

Half a small red onion—sliced thin

1½ tbsp freshly squeezed lemon juice

1 tbsp olive oil

salt and freshly ground black pepper

Place a saucepan over a low heat and pour in the quinoa.

Let it dry roast for 5 minutes–stirring all the time.

Add the stock and bring to a simmer.

Cover and cook for about 20 minutes–until the quinoa has absorbed the liquid and has puffed up.

Set aside to cool.

Add the oil and lemon juice to the cooled quinoa and stir in with a fork.

Fold in the mint and parsley, again stirring them with the fork.

Season with salt and pepper to taste.

Transfer the salad to a pretty plate.

Sprinkle with some more mint and parsley.

Read Full Post »

IMG_3983

I wrote this haiku a couple of years ago in the last week of June:

Garlic gath’rers pass,

Leaving the scent in the air;

It’s that time again.

It’s that time–again; but three weeks later than normal (due aux mauvais temps [bad weather] in May and June).

IMG_4002

The question now hanging in the air (with the whiff of garlic!): will there be enough of the lovely stuff ready for the Garlic Festival–always held in our village on the first Friday of August?

Alice Frezouls, our neighbour, called in at noon yesterday with  bunch just lifted–a gift! She was hot from the field and called the work travail bagnard, which translates as hard labour–in the sense of a prison sentence.  (What must it have been like before the machine above took over the lifting?!)

She was making light of it though.

IMG_4062

The fields are still unseasonably sodden and the clumps of garlic are coated with earth–adding irksomeness to the lifting and cleaning process.

IMG_4064

The garlic must spend weeks drying out before being hand cleaned, plaited and sold.

This was done in barns open to the heat of summer air passing naturally through them.

IMG_2060

IMG_2055_2

Now with garlic production increased, noisy drying machines–great ventilator fans–are used more and more.

The first year this happened we complained to Pierre-Louis–our young farming neighbor. He came over and agreed that we were in a noise corridor where the sound of his industrial dryer was penible–difficult. He improvised with stacks of hay bales to blanket the racket and we lived with it.

He has refined the process and for the next month we are resigned to eating dinner on the terrace to the accompaniment of a low, single-noted wind machine–not a woodwind quartet–that drifts in and out of our consciousness.

The reports that the Garlic Festival risks being like Hamlet–but without the Prince–are exaggerated, or so we have been reassured.

If they’re desperate I’ll offer mine!

IMG_4065

On verra!

Read Full Post »

We had these again yesterday for lunch with a reprise of the cucumber salad.

IMG_3572

Filleted fresh sardines, sometimes available at the fishmonger, make life easier–though I remember feeling very virtuous after filleting sixty sardines with my cooking partner for a workshop Meredith ran a few years back.

We were rewarded with a loud exclamation of “LOOK at THAT!” from one of the participants, when he saw the wide sardine-laden platter.

Butterflied sardines for 2 takes less time!!

10 firm and fresh sardines–butterflied (see below)

100gms/4 oz wholewheat breadcrumbs

1 tablespoon parsley–chopped

2 garlic cloves–chopped fine

1 tablespoon of capers–chopped

a pinch of dried oregano

3 tablespoons olive oil

salt and pepper

Butterfly filleting is a bit of a business–but rewarding.

You’ll need a chopping board and plenty of kitchen paper. Have a pair of scissors to hand and a plate to receive the fillets.

Ensure there are no scales left on the fish, then (for right-handed cooks) hold the the fish in your left hand belly up and with a pair of scissors snip along the belly from the tail end cutting off the head when you reach it.

Then with your right thumb, coax out the rest of the innards. Place the fish, belly side down on the board and press gently up and down the backbone with both thumbs–to open it up and out.

Flatten the fish as much as you can with three fingers of both hands.

Lift the small fin and and snip it off, then cut the backbone at the tail end and draw it carefully away from the body, taking care not to take too much of the flesh with it.

Voila! You have a butterflied fillet.

Heat the oven to 180°C/350°F/Gas Mark 4

  • Wash and dry the fillets.
  • Place a sheet of foil on a shallow baking tray (makes clean-up easier!).
  • Using a basting brush, spread a tablespoon of oil on the foil.
  • Place the fillets on the tray.
  • In a bowl combine the breadcrumbs, parsley,  garlic, capers, oregano.
  • Season with salt and pepper.

IMG_4050

  • Add a tablespoon of olive oil to the mixture and turn it over thoroughly.
  • Spread the breadcrumb mix evenly over the fillets–using a teaspoon.

IMG_4051

  • Drizzle the remaining olive oil over the fillets, adding a little extra if needed.
  • Sardines before going into the oven

  • Bake for 15 minutes.
  • Sardines post oven

Finish off by a short burst (under 30 seconds) under a hot grill.

Read Full Post »

Hot, hot here, at last (chez vous too perhaps?)–begs a cool cucumber response!

Requested by Meredith a couple of days ago, this recipe features in Healthy Eating for Life–my new cookbook, out in January 2014.

IMG_3579

As I didn’t have a red onions to hand, I substituted spring onions (scallions).
However the red onion lends a nice colour contrast.

Served this with sardines–cuts nicely the rich, oiliness of the fish.

IMG_3577

serves 4 as a side salad

1 medium cucumber—peeled and sliced thin; a food mixer disc saves time here

1 small red onion—sliced thin

1 tbsp cider vinegar

1 tsp Dijon mustard

pepper

1 tbsp parsley or dill (dill is preferable but sometimes difficult to find).

Combine the prepared cucumber and red onion and sprinkle with salt.

Let the mix drain in a colander or sieve for 30 minutes or longer.

Spread the mix over a layer of kitchen paper, cover with a second layer and press down gently to lift off excess liquid.

Put it on a favourite serving plate or in a bowl.

In another bowl, whisk together the vinegar and mustard; fold in the chopped herbs (dill or parsley).

Pour this over the cucumber and onion and mix well.

Leave this to luxuriate for an hour in the fridge.

IMG_3573

Read Full Post »

Meredith brought a cucumber home yesterday and requested the cucumber salad that’s included in my new book–Healthy Eating for Life due out next January.

I’m thinking to save it ’til tomorrow to go with some sardines from Realmont market.

We’ll have her cucumber for lunch though in this simple, quick-to-do tuna salad below from Delicious Dishes for Diabetics.

Tuna Salad  

Adapted from an early Nigel Slater recipe, this is very handy as a quick standby when you feel at a loss for something to serve as a light lunch.

IMG_3843

for 2 (in the book the amounts are for 4)

1 x 200 g/7 oz tins of tuna–drained and flaked

2 tbsp Dijon mustard
2 tbsp tarragon vinegar (plain white vinegar will do but the tarragon flavour is a nice touch)
4 tbsp olive oil

4 tbsp low-fat yogurt–put in a fine sieve and drained a little to thicken it

1⁄2 cucumber–peeled, quartered, deseeded and diced. Then sprinkled with salt and left to drain for half an hour

IMG_3834

1 tbsp parsley–finely chopped

1 tbsp chives–finely chopped

salt and pepper

2 spring onions–cleaned and finely chopped
1 tbsp sunflower seeds–lightly toasted 
a little extra parsley–finely chopped

Put the tuna into a favourite serving bowl and add a couple of twists of the pepper mill.

IMG_3837
Whisk the mustard, vinegar, olive oil, yogurt

IMG_3836

add the parsley, chives, salt and pepper together into a thick sauce.

Add the cucumber, onions and seeds.
Pour the sauce over the tuna and turn over all the ingredients carefully.
Sprinkle over the remaining parsley and serve with a crisp green lettuce. 

Read Full Post »

The aubergine–eggplant–melanzane–enigmatic gentle giant of a vegetable.

26FLEX-SPAN-articleLarge-v3-2

Lovely conceit from Mark Bitman in The New York Times demonstrating its versatility.

Not included in the diagram but a useful addition to the repetoire, this tortino recipe is adapted from Paola Gavin’s Italian Vegetarian Cookery.

IMG_3779

A tortino is a sort of soufflé crossed with a no-pastry pie–handy for those who need to watch their intake of refined carbohydrates.

It’s a little labour intensive but pays off.

600/700 gms aubergine [eggplant]–peeled and sliced thin

IMG_3761

IMG_3762

olive oil for brushing

2 1/2 oz tomato sauce–see below

2 oz grated parmesan

5 eggs

salt and pepper

Lightly salt the aubergine slices and leave them to drain for at least an hour.

Set the oven to 190C

Dry the slices in between sheets of kitchen paper.

IMG_3765

Oil a couple of shallow oven trays.

Lightly brush the slices with olive oil and lay them out on the trays.

IMG_3767

Bake for 5 minutes each side on the top shelf of the oven–one tray at a time.

Heat a cast iron grill pad to hot.

Transfer the slices onto the grill pad and char them for a couple of minutes each side.

IMG_3769

(The grilling adds a smokey taste; you could fry the slices or just leave the slices in the oven longer but they must cook to tender.)

Oil a shallow oven dish and layer the cooked slices in the bottom.

IMG_3773

Whisk the cheese and the tomato sauce together and season with salt and pepper.

Whisk the eggs and stir them well into the mixture.

IMG_3775

Pour this over the aubergines.

Make sure the mix covers the aubergine slices.

Bake in the middle of the oven for 20 to 25 minutes.

IMG_3781

Quick Tomato sauce

A handy standby sauce.

I made this in a jiffy this morning and used 2 1/2 oz of it for the tortino leaving easily enough for our pasta tonight–giving me time to follow some of today’s stage in the Tour de France!

2 tbsp olive oil

large tin of tomatoes–drained of their juice and roughly chopped.

garlic cloves–peeled and thinly sliced.

salt and pepper.

2 sprigs of rosemary–chopped.

Heat the oil in a large pan and add the garlic and the rosemary.

Soften the garlic, being careful not to let it burn–a few seconds.

Add the tomatoes

IMG_3763

and cook over a high heat–stirring often–until the loose liquid has evaporated and little pockmarks appear on the surface.

If you can part the Red Searunning a spoon through it–it’s done.

Season with salt and pepper.

Voila!

Read Full Post »

IMG_3566

We first had this dish at Donald Douglas’s birthday lunch. (Donald played the dourly determined Captain MacNeil in Poldark and has been a cherished friend and neighbour of ours here in France for years.) It was his step-daughter Daisy’s birthday contribution to the celebratory feast…

IMG_4455

…together with a magnificent cream sponge with lighted candles!

It’s versatile and can be served in a number of ways–as a salad or a vegetarian main course or a side dish–it has a pleasing depth of taste.

Soaking the brown rice beforehand helps it to cook more easily in time with the lentils.

100gms basmati brown rice

175 gms puy/green/brown lentils

1 tblsp cumin seeds

1 tblsp coriander seeds

2 tblsps olive oil

1/2 tsp turmeric

1 tsp each ground allspice and cinnamon

salt and pepper

300 ml hot water

1 large onion–peeled, halved and sliced

2 tblsps olive oil

Small bunch parsley or coriander–chopped

  • Wash the rice and soak it in a bowl of cold water for twenty minutes.

IMG_3558

  • Dry roast the cumin and coriander seeds in a small pan until they begin to colour.

IMG_3553

  • Then pop them in a mortar and pestle them to break them up a bit.

IMG_3556

  • Wash and drain the lentils,  bring them to the boil in plenty of water and cook them until they begin to soften–about twenty minutes–they should not become mushy.
  • Drain the lentils and return them to the pan.
  • Mix all the spices with the two tablespoons of olive oil.
  • Drain the rice and add it to the lentils in the pan.
  • Mix in the spices and turn over everything together.

IMG_3561

  • Integrate the hot water and season with salt and pepper.

IMG_3562

  • Bring up to the boil, turn the heat to low and cover the pan tightly.
  • Cook until the rice is done–allow about thirty minutes.

IMG_3563

  • As it cooks heat two tablespoons of olive oil in a pan and fry the sliced onion slowly until it colours and crisps a little.

IMG_3676

  • When the lentils and rice are cooked fold in the onions–leaving some to sprinkle on top with the parsley or better still the fresh coriander.

Read Full Post »

« Newer Posts - Older Posts »